Detailing
Details (Pro)
Detail Sheets are specialized drafting sheets used to add detailed views of the project. This class of sheets allows a better organization of the project by separating the drawing sheets, where the project is, from the other drawings that complement the main design. Details are typically “extracted” from a larger design and include additional elements and information, usually at a larger scale.
There are two methods for creating a detail sheet: by detail area and as an independent detail.
To create a detail sheet by a detail area:
- Go to the drafting sheet where the desired drawing is and create a detail area on the part of the drawing from which the detail is going to be generated.
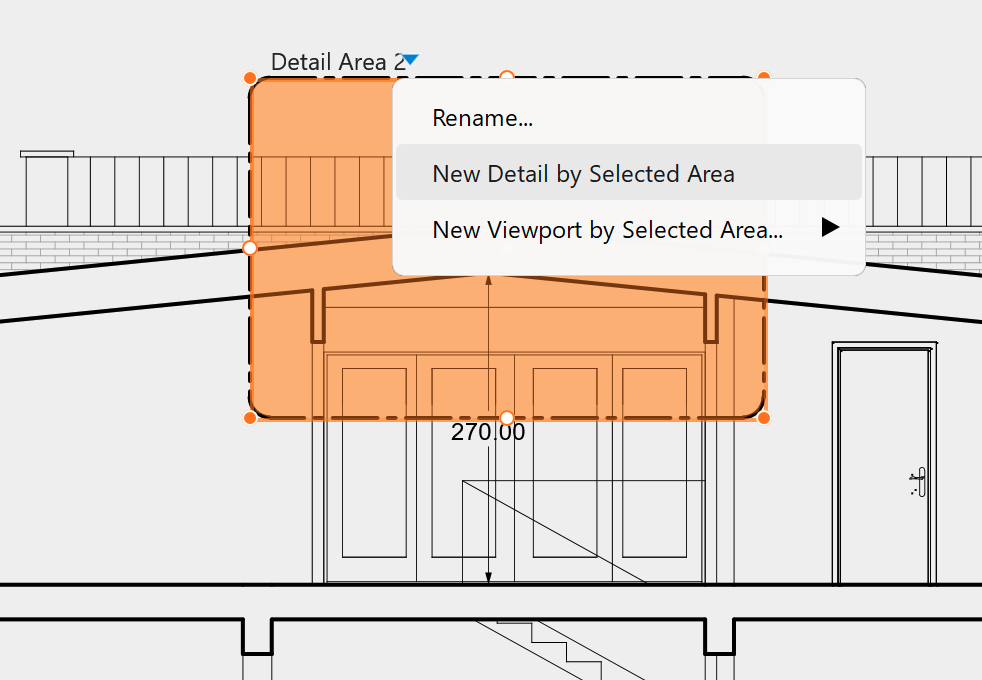
- Select the detail area, click the drop-down triangle next to the area’s title and choose New Detail by Selected Area.
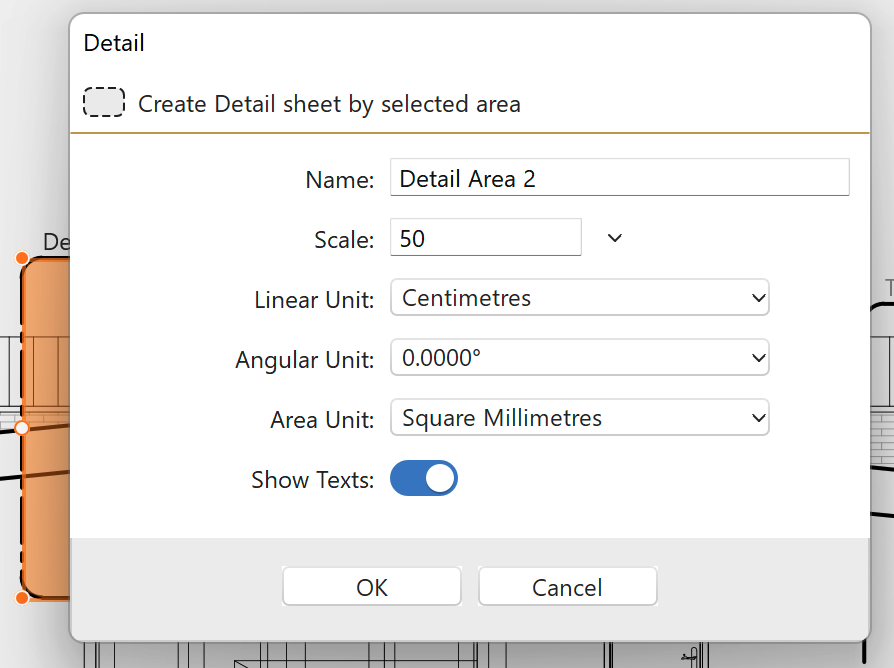
- In the dialog, enter the name of the detail sheet and define its scale and units. The Show Texts switch controls the visibility of texts, dimensions and other annotations in the detail. All these options can also be set later in the Object Info panel.
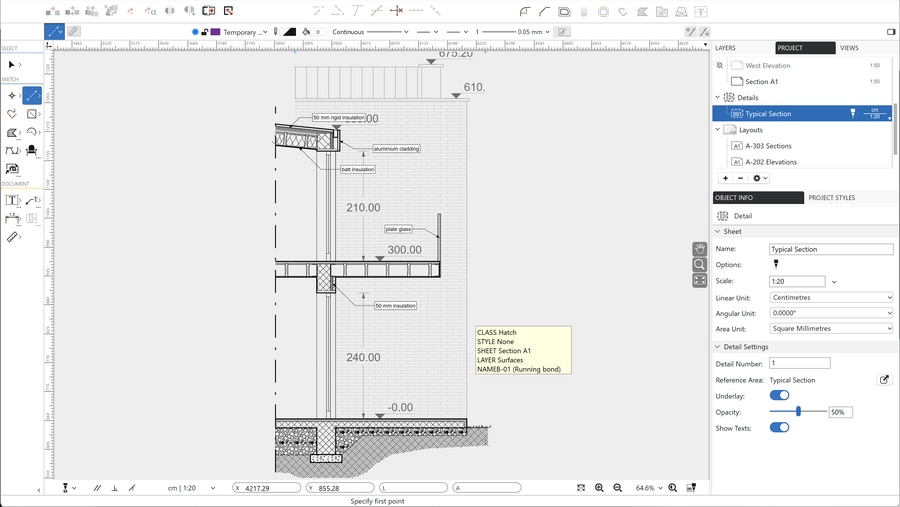
The new detail sheet by default shows the drawing contained in the source area. This is called “underlay” and it can be toggled on and off and displayed at the desired opacity. The underlay serves as a reference for further drawing and automatically updates whenever the original drawing is changed. The objects that are visible on the underlay can be snapped, but cannot be selected.
To create a new detail sheet as an independent detail:
- On the Project Browser, click the plus (+) icon on the Details group heading or choose Project > New Independent Detail…
- Define the sheet’s properties in the pop-up dialog.
- Independent details are not linked to a detail area and show no underlay.
Detail sheets support a sub-set of the drawing tools: you can use sketching and documentation tools, but design tools as Walls or Windows are not available.
In linked details, the underlay can be exploded and turned into a group for editing and further transformations: to explode the underlay use the menu item Project > Explode Underlay.
The Object Info panel provides the main information and the options of the current Detail. Details do not have the Paper Size option. To add a detail to a layout, create a viewport on the layout and choose the detail as source sheet for that viewport.
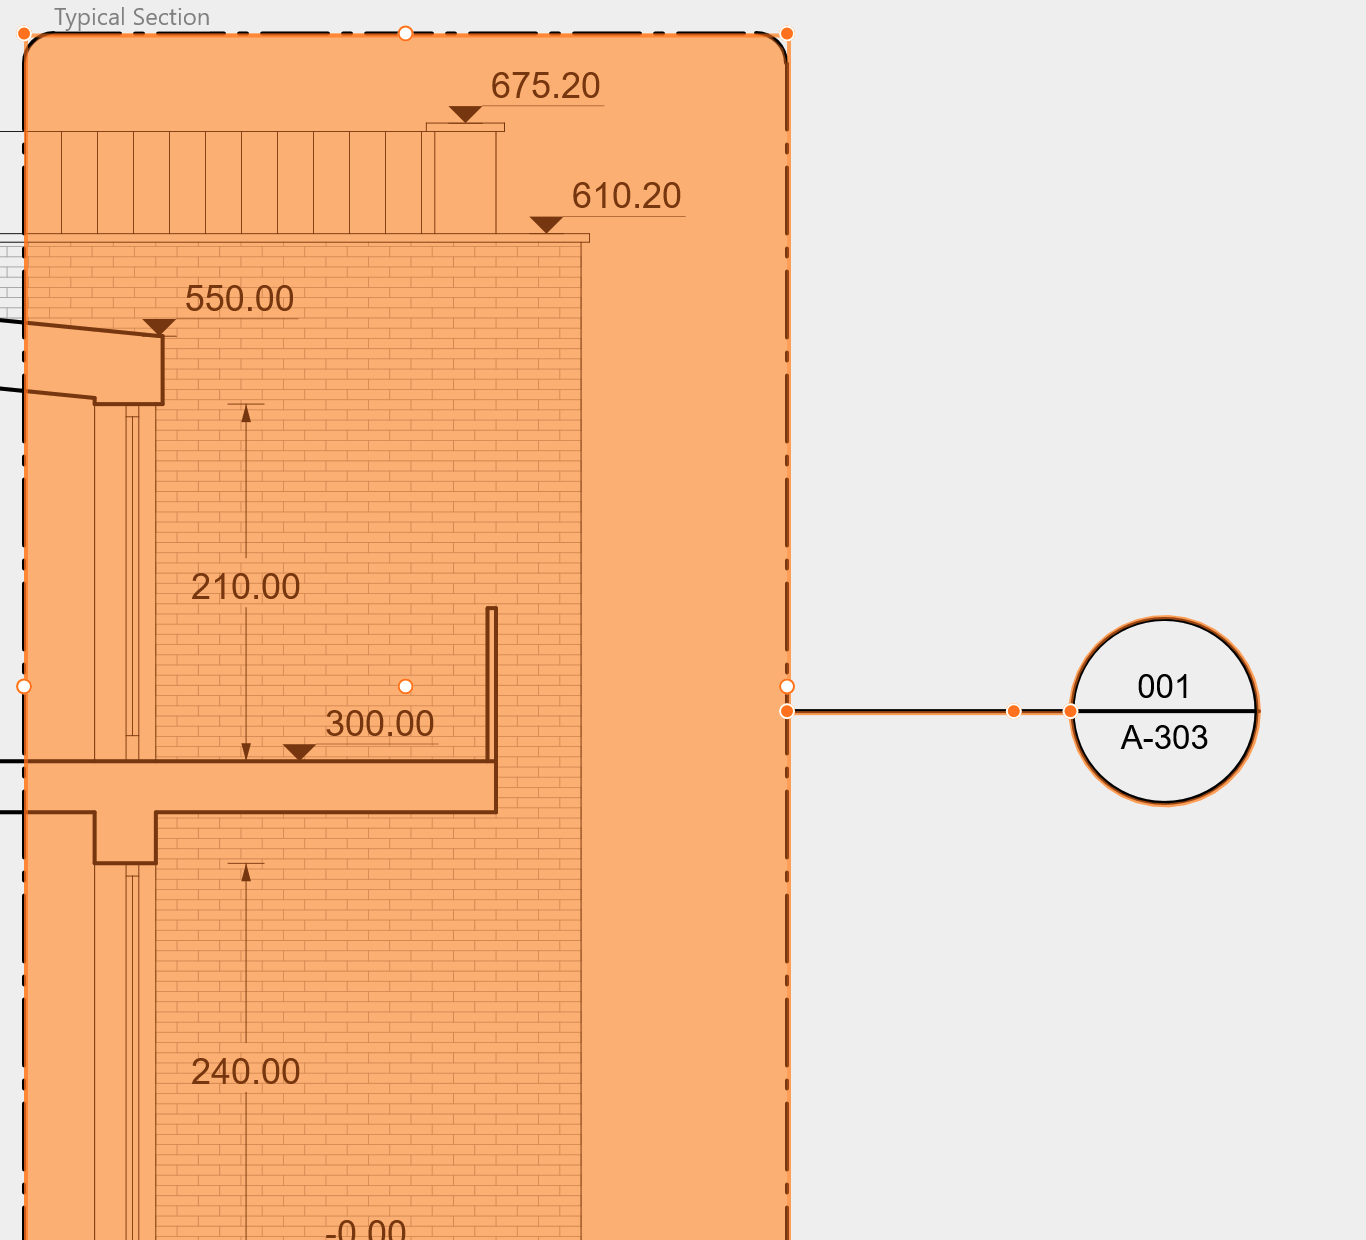
Once a detail area is linked to a detail sheet, it becomes a Callout. Callouts have an additional marker that contains information about the detail:
- the upper half shows the identification number of the linked detail sheet.
- the lower half shows the layout identification number where that detail has been placed as a viewport.
When the detail area is selected, you can click either of the labels in the callout mark to go directly to the linked sheet.
Further information about detail areas is available on the chapter Annotate the Project.