Subsections of Project Settings
Appearance
This pane lets you customize your HighDesign work environment. Use it to define background and selection colors, the style of construction points and lines.
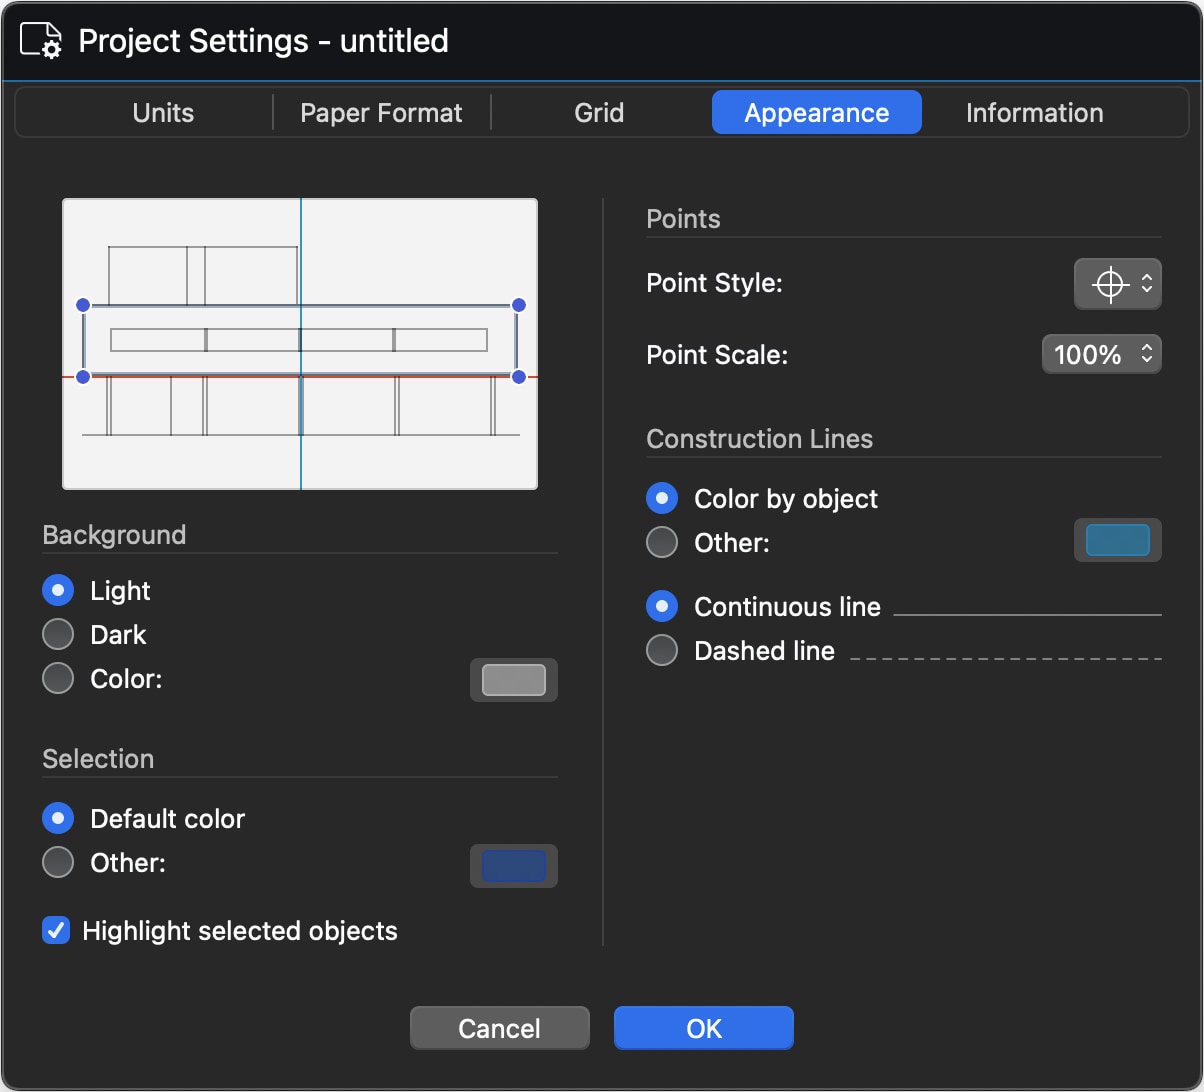
The background color can be set as light, dark or custom. This setting only affects drafting and detail sheets. Layouts always use white as background color.
You can define the color of the selection handles and highlights, and choose to turn highlighting off on selected objects.
The next section includes controls for construction points and lines. These settings are global and change the appearance of all construction objects in the project.
Project Units
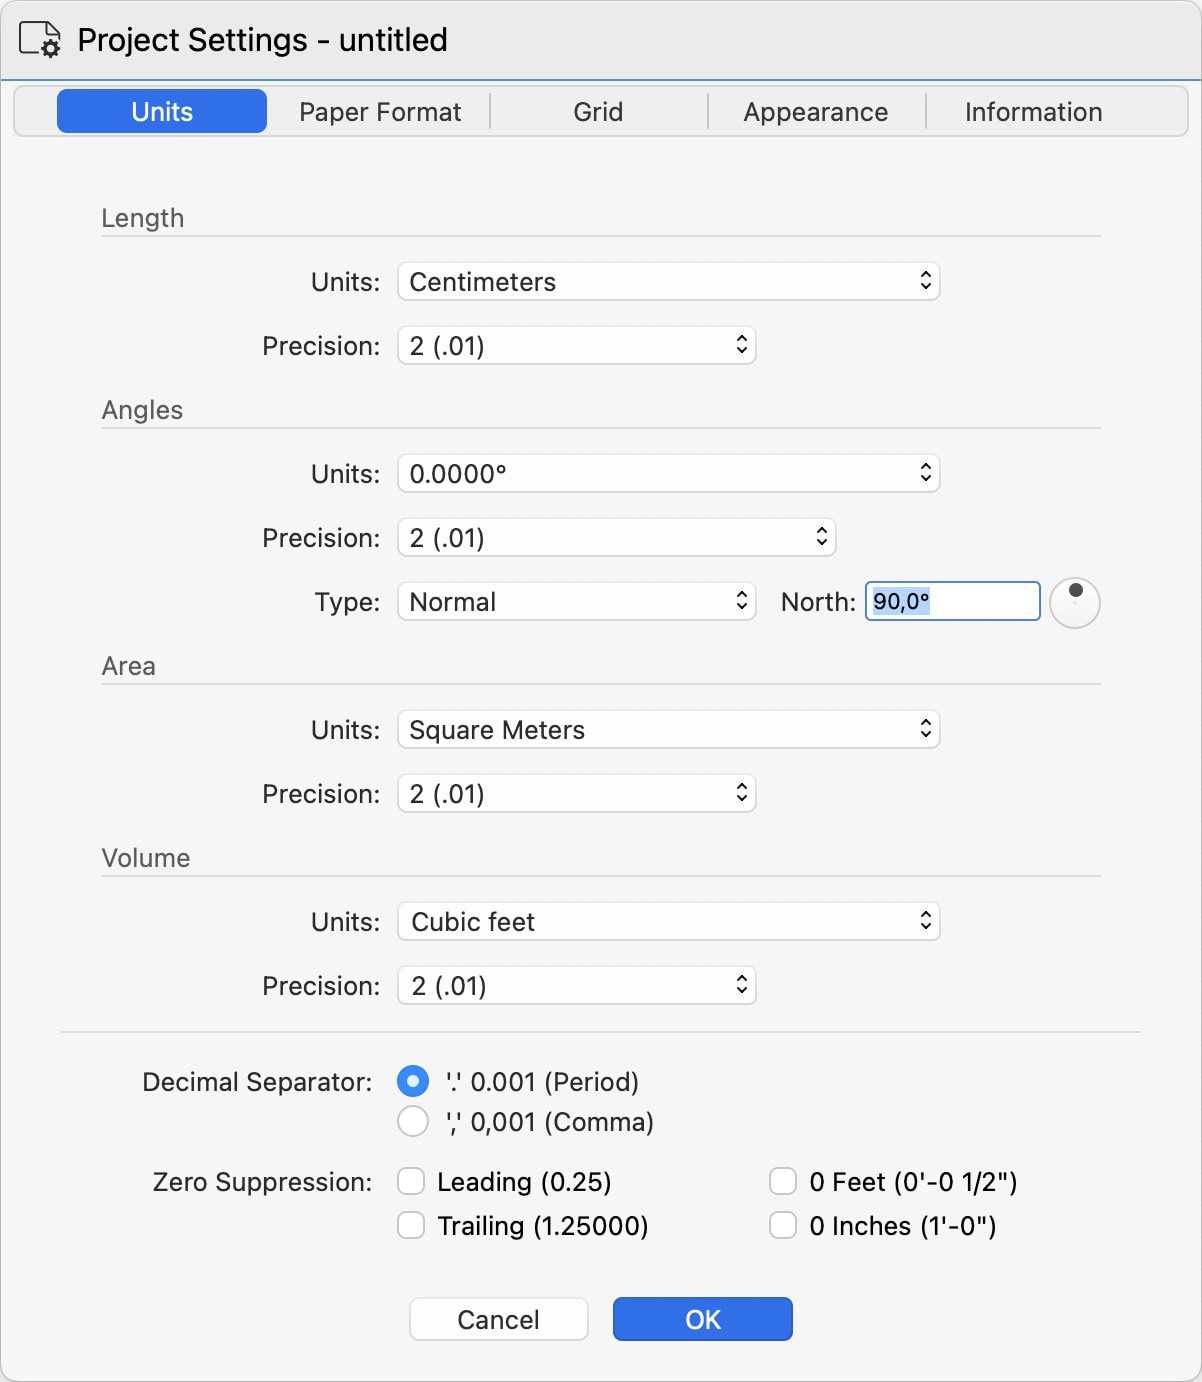
Use the Units panel to set the project units and specify the formatting rules. To access the Project Units panel, choose the menu item File > Project Settings > Units or Project > Project Settings > Project Units.
 _
_
The panel is organized in sections that let you specify the units for lengths, angles, area and volume, and includes options to select the decimal separator and suppress the zero digits.
The settings in this panel act as default settings for all items and tools of the software. Some objects, like Dimensions, also allow custom settings for units in addition to the default, project-wide settings.
Length
Defines the units that show linear measures. Use the Units menu to select the desired measurement unit and the Precision menu to specify the rounding. Changing the precision does not affect that actual value stored in the project, but only changes the way that value is displayed in the software.
- Decimal units can have a precision in the range from 0 (no decimal digits) to 8 decimal digits.
- Fractional units can be set to a precision from 1/2 to 1/64
Angles
Angles can be expressed in a number of standards:
- Decimal degrees (0.0000°)
- Degrees and minutes (0° 0')
- Degrees, minutes and seconds (0° 0’ 0’')
- Radians (0-2 Pi)
- Centesimal (0-400 gradians)
Angle precision ranges from 0 (no decimals) to four decimal digits (0.0001).
Angles can also be expressed as Normal, Bearings and Azimuth relative to the North.
The Angles section also includes a control to specify the project north.
Area
Areas can be displayed in international or imperial square units, or square points. Their precision ranges from 0 to 8 decimal units.
Volume
Similarly to area units, volume units are available in both international and imperial cubic units, with precision ranging from none (0) to four decimal digits.
Display Options
You can set the decimal separator character as comma (",") or dot ("."). While this setting affects displayed units, you can enter units either way as you are more accustomed to and the software will accept and parse your input.
You can also decide to trim leading, or initial, and final, or leading, zeros from numbers. For example, when leading zeroes are suppressed, 0.25 is displayed as .25 and when trailing zeroes are suppressed 1.25000 becomes 1.25.
Fractional units can also be displayed with or without 0 feet and 0 inches.
Paper Formats
The Paper Formats panel lets you select the default paper size of the entire project from a list of standard sizes (ISO, ANSI/ASME, US ARCH, and more) and activate the options for Page orientation and margins. The page standard and size defined in this window is the default for all new layouts.
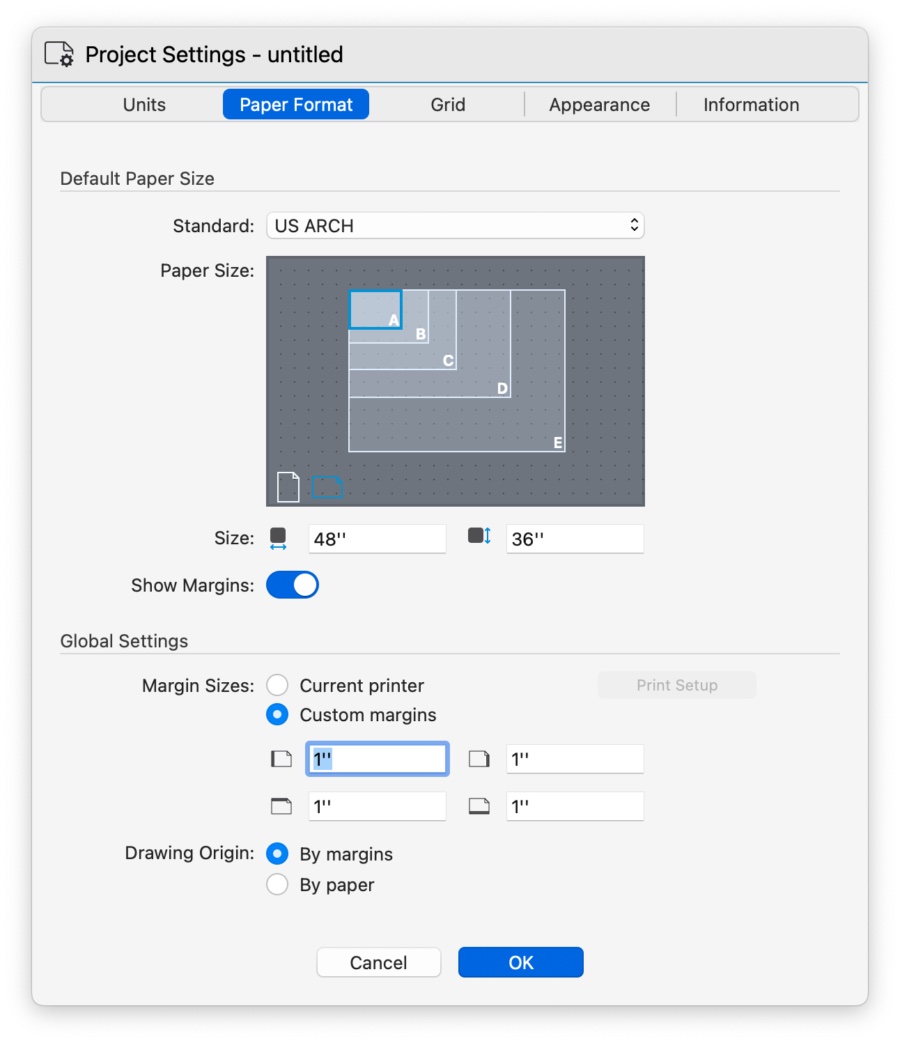
Default Paper Size
To set the dafault paper size:
- Choose the reference standard from the list of common paper size standards: ISO, North American, ANSI/ASME, and custom sizes.
- Once you select the standard, the Paper Size view shows the paper sizes from that standard. Click a size to select it and choose the orientation by clicking the Portrait or Landscape icons.
- The Width and Height fields show the dimensions of the selected size. The fields are not editable for default sizes, but can be used to define a custom paper size.
- Use the Show Margins switch to display or hide the margins of the paper.
Global Settings
Use this section to define the margins of the paper. These settings apply to all sheets regardless of the current paper size.
Select Current Printer to inherit the margins from the current printer, or Custom Margins to enter them using the input fields.
Drawing Origin
This setting controls the location of the origin of the drawing in a layout.
- The default setting “By margins” places the origin of the drawing at the lower-leftcorner of the page margins. When this is active, changing the page margins will not affect the relative position of the drawing on the layout.
- The “By paper” setting places the origin of the drawing at the lower-left conrner of the physical paper. With this setting, changing the page margins also affects the relative position of the drawing.
Important
Projects created with HighDesign R8.1 default to “Origin by paper”. If you want to change this setting in older projects, remember that the position of the drawings on the layout may need to be updated.
Custom Paper Sizes
You can define custom paper sizes with the Custom Paper Sizes dialog window.
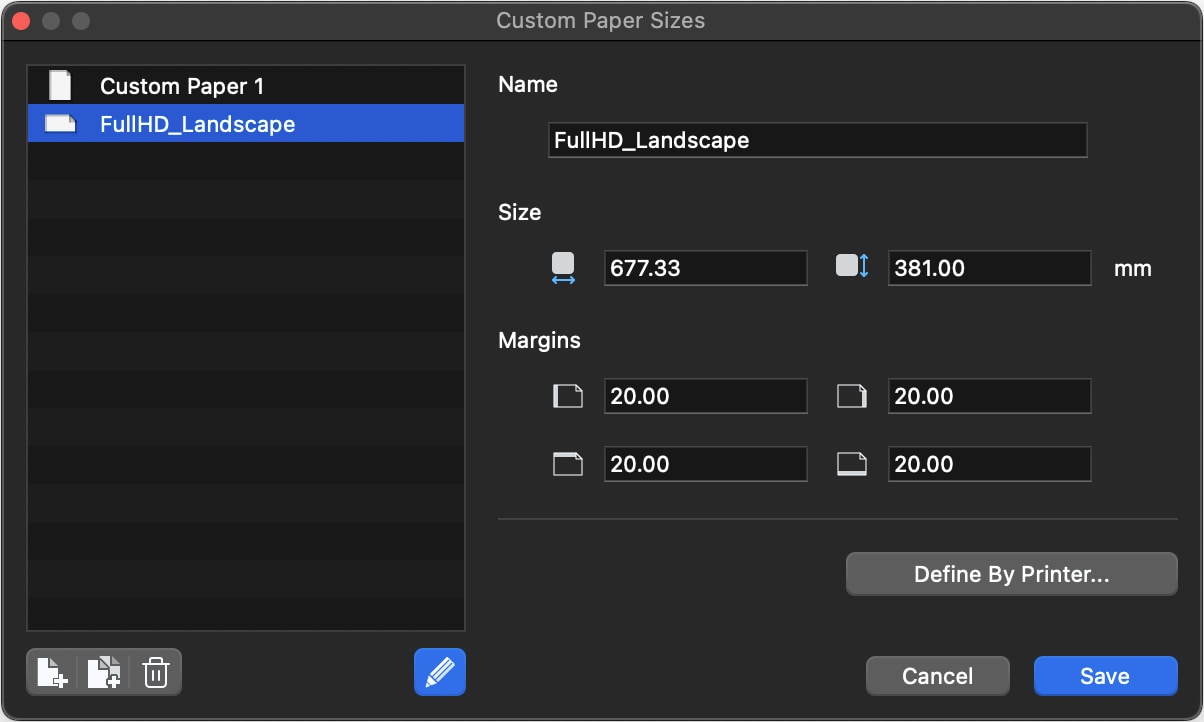
You can access this window from the Standard menu to create and manage custom paper sizes. A custom paper size can have user-defined size and margins, or it can inherit the actual values from an installed printer. Click the “Define by Printer” button to open the system printer dialog to select a printer and a paper size.
Saved presets can be renamed, edited and duplicated and deleted at any time. They are also available in the Paper Size windows of sheets and layouts.
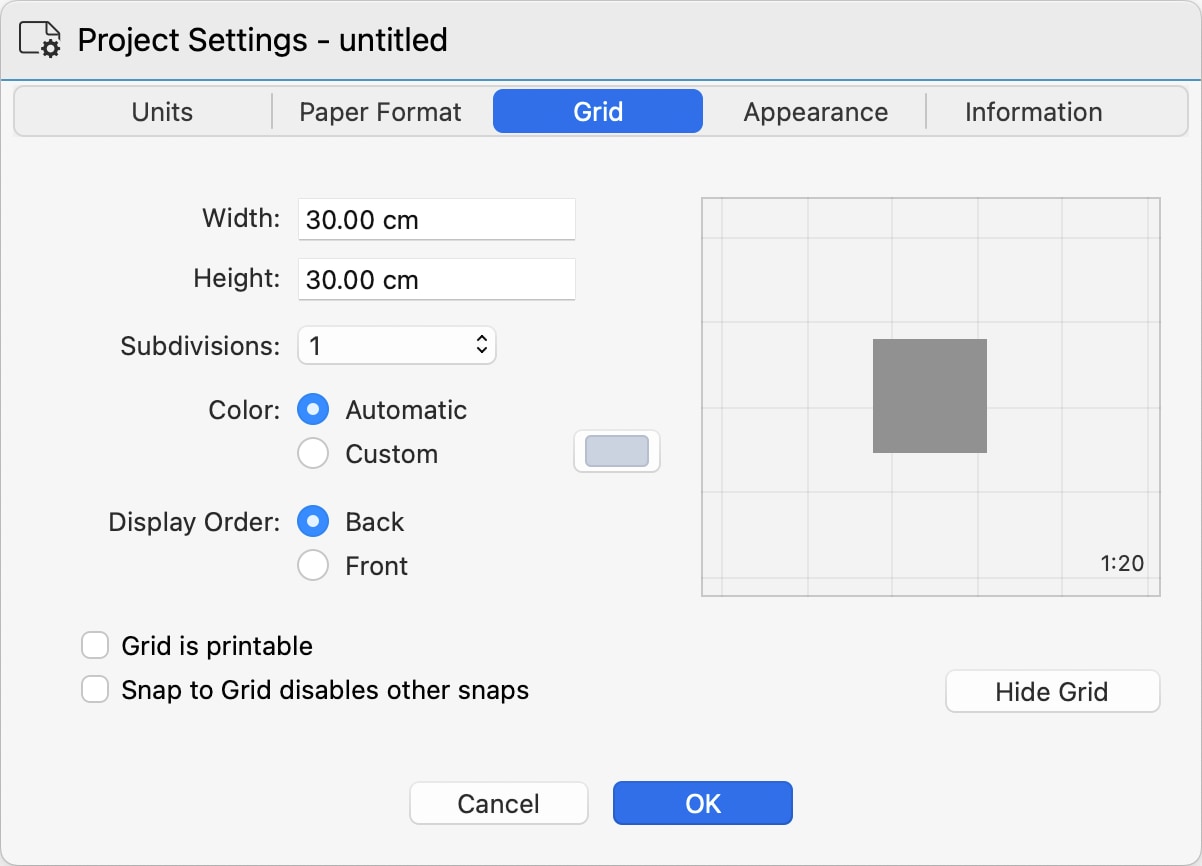
Project Grid
You can use this pane to customize the project grid and set its options. The project grid is a graphical aid that displays a grid with major and minor divisions on all drawing sheets. The size of the grid is at 1:1 scale and is displayed at the scale of the current sheet. For example, a 30x30 cm grid will appear larger when switching from a 1:20 sheet to a 1:10 sheet.
 _
_
To define the grid:
- Define its real-world size using the Width and Height fields.
- Define the number of subdivisions from a minimum of 1 to a maximum of 12. A subdivision value of 1 means that no subgrid will be displayed.
- Define its color. The Automatic color is calculated as a dimmed contrast color to the current background defined in the Appearance panel.
- With the Display Order controls you ca choose whether to display the grid behind the drawing or in front of it.
By default, the project grid is hidden on printouts. Activate the Grid is printable checkbox to make the grid visible on printouts.
The project grid can be used with the Snap to Grid option. You can also choose to make this type of snap exclusive so that all other snaps are disabled when Snap to grid is turned on.
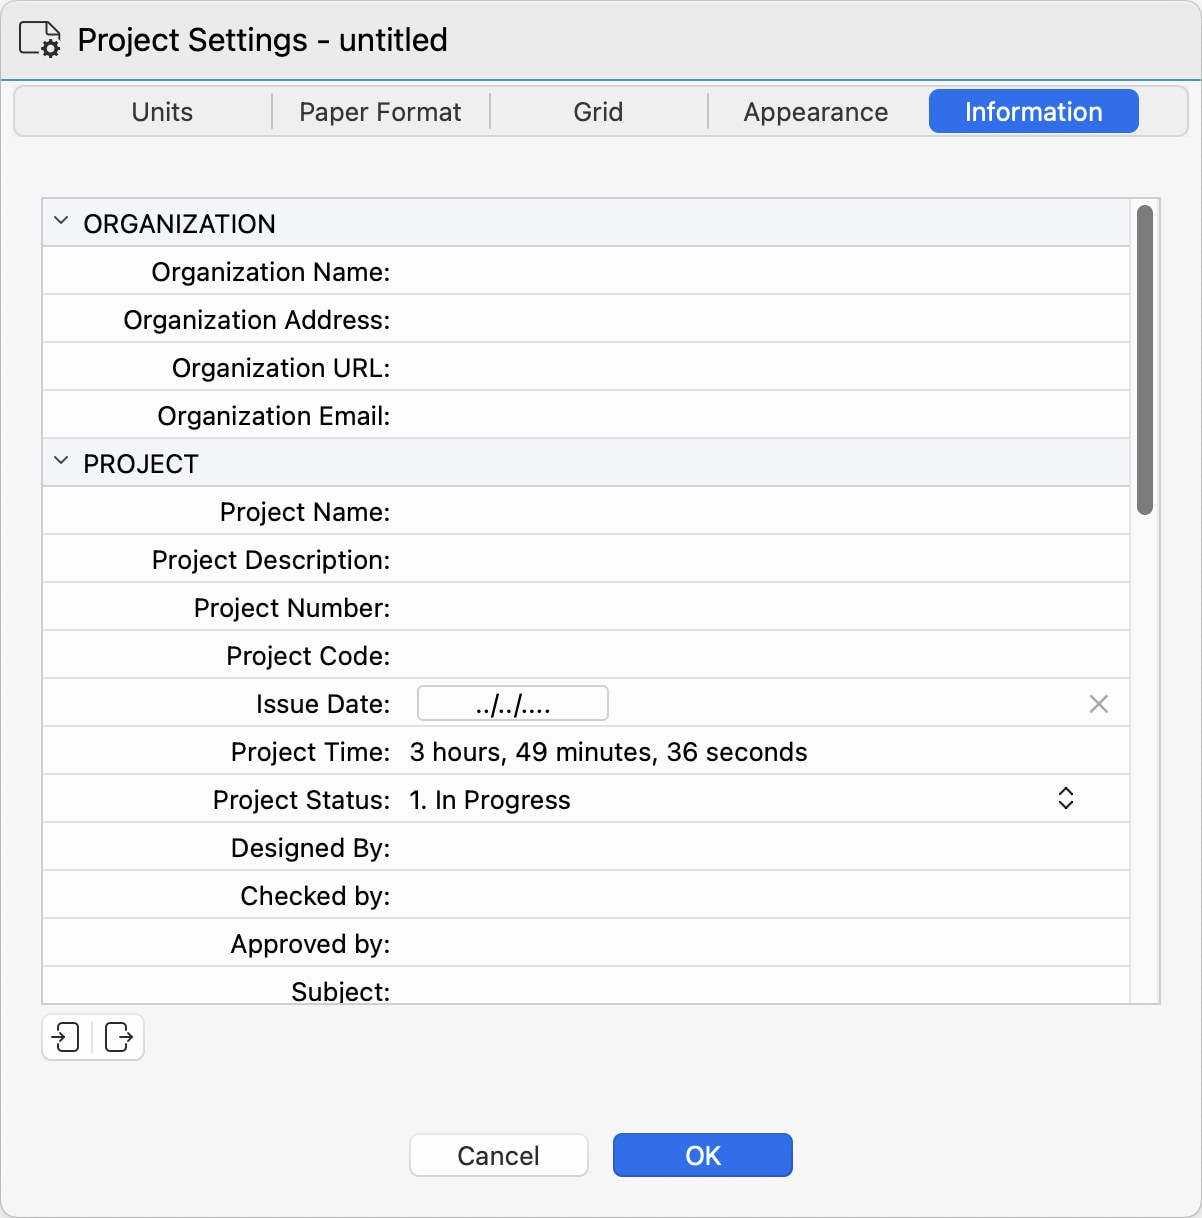
Project Information
Use this panel to enter all the information about the current project, such as your organization name, project name and code, client, site, etc.
The Project Information panel is only available in HighDesign Pro.
 _
_
These information will be used throughout the project by variables, schedules, and title blocks.
The data can be exported and imported as a Comma-Separated-Value (CSV) or XML file.