Subsections of Texts
About Texts and Labels
Use the Text tool to add styled text blocks and labels to your project. With the text tool you can create multi-line text blocks with different internal font styles and colors, use alignments, and apply border shapes to create a variety of notes, labels, title block paragraphs.
The Text tool includes two methods, text block and text label. Both methods create a text object.
Text objects can be created on drafting sheets, details and layouts. The text can be inserted directly in HighDesign or pasted from another application.
Text objects are treated like any other drawing item, but their internal drawing scale is always 1:1, so that the font size does not change with the sheet scale.
Topics in this section
- Text tool settings
- Insert Text Blocks
- Place Text Labels
- Editing Text Blocks
Editing Text Blocks
Text blocks are rectangular objects that can be moved, resized and rotated. To edit a text block, select the object, then:
- Click the center to move it.
- Click one of the corners to resize the box, and hold the Shift key to resize it proportionally.
- Click on the middle point of one of the sides to resize the box in that direction.
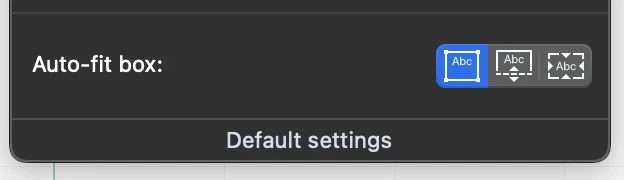
Resizing and the Fit Box Modes
A text block can be freely resized in all directions only when its fit-box mode is set to “fixed-size box”. In this mode, the text block keeps the width and height that you define.
When the fit-box mode is set to “fit height”, you can only resize it horizontally, that is in the direction of the lines of text, so as to enlarge the available line width.
When the fit-box mode is set to “fit-contents”, the text block cannot be resized because its size is calculated on the current text.
 _
_
Insert Text Blocks
Use the Text Block method to insert multi-line text paragraphs with text styles.
Click to set the base point, drag the pointer to set the width and height of the text field, exactly as drawing a rectangle, and insert the text in the input box; this box also supports the “Cut, Copy, Paste and Select All” commands.
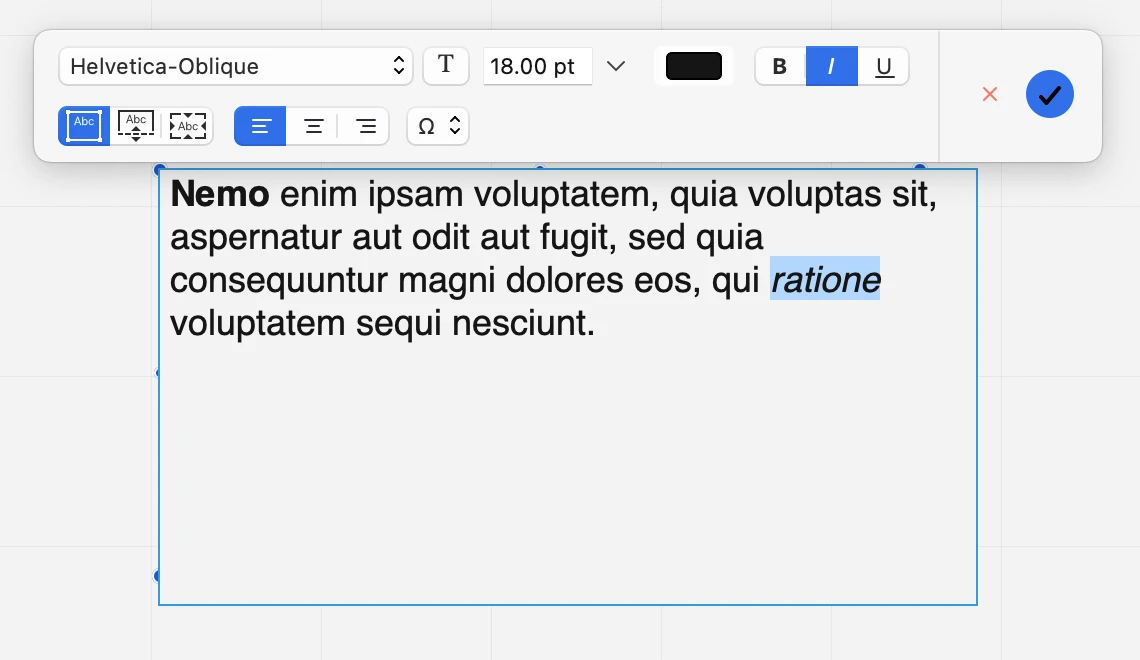
When you define the block, a toolbar opens to let you define character styles.
 _
_
- To apply a style to a character or one or more words, select them in the text input area and choose the desired option on the toolbar.
- Box fit style and horizontal alignments apply to the entire block
- Use the Special Characters menu to insert special characters into the text
- To confirm the text and end the insertion, click outside the text box field, or push the OK button on the Text Style toolbar, or push the Enter key on an extended keyboard.
Place Text Labels
Use this method to place text labels on the drawing without having to define a box or character styles. When you create a text label, the text style toolbar is not available.
After entering the text, you can define a rotation angle for the text.
Steps
- Click to define the insertion point of the text, that is the bottom left corner of the label.
- Enter the text.- 3. Press Return to add a new line of text and create a multi-line label, or 4. Click outside or press the Enter key to end the text insertion.
- Define the angle by moving the pointer. Click to complete the insertion.
To add the label directly without defining the rotation, hold the Command key (Mac) or Control key (Windows) and click outside or press the Enter key.
Text Tool Settings
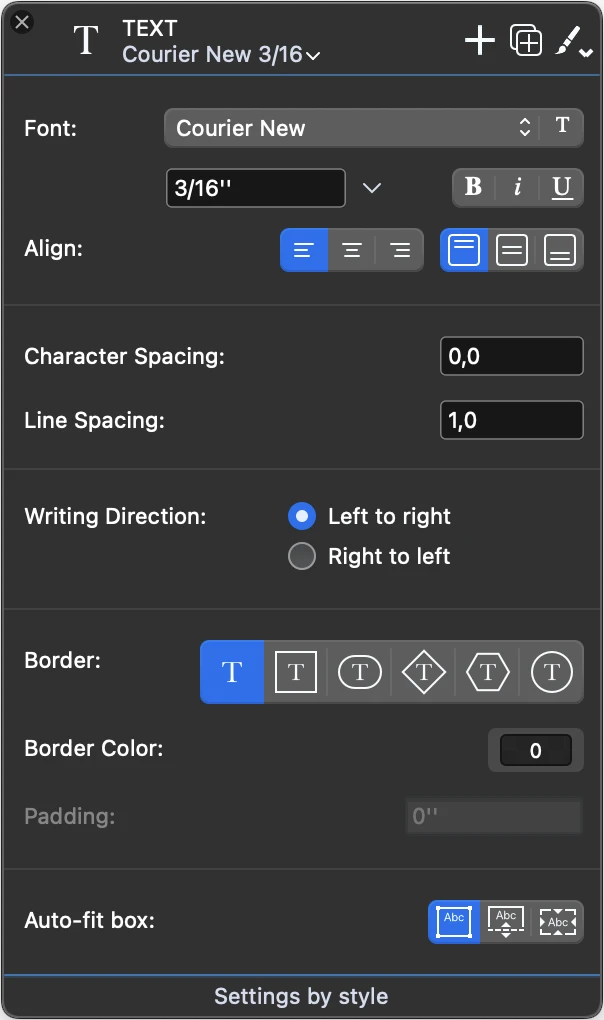
Use the Text settings window to set and edit the parameters of the text object. This panel includes five sections: font style and alignments, spacings, writing direction, border and box behavior.
 _
_
Font Style and Alignments
Use this section to define the default font properties and horizontal and vertical alignments of the text inside the block. You can select the following properties:
- Font face, selectable from the list of font families installed in your system. You can also access the Font Panel to select a different typeface (only supported for the entire text object).
- Text size, in any supported measurement unit; open the pop-down menu to select a different unit.
- Text style (bold, italic and underline) of the entire block.
- Alignment (left, centered, right; top, middle, bottom), in both multiline texts and single line labels.
Some values such as font style and size can be overridden by character styles.
Spacings
Use these fields to specify character and line spacing.
- Character spacing is the distance in points between each character. You can enter positive values, to create extended text styles, or negative value to create a condensed text style.
- Line spacing is the distance between lines of text. The default value is 1.0, which means that each line is rendered exactly under the previous line with no offset. Positive values increase the distance and negative values reduce it.
Writing Direction
You can specify if the text lines are entered and rendered from left to right, or right to left.
Border
Text blocks can optionally display a border around the text. The available shapes are:
- None. The text block shows no border.
- Rectangle
- Oval, or “pill” shape
- Diamond
- Hexagon
- Circle
You can also specify a border color and a padding, that is the distance of the text from the border.
Auto-fit box
Auto-fit box options: fixed size, flexible height, fit-text. When flexible height is active, the height of the box adjusts to the number of lines of text.
NOTE To set the color of the entire text box, use the colors menu on the Properties Bar.