Install Guide for HighDesign
HighDesign Trial Version
When you download HighDesign from the Ilexsoft website, the software launches as a time-limited trial version.
The limitations of the Trial version are:
- Operative for 30 days of use;
- Printed pages and exported images have a “HighDesign Trial” watermark;
HighDesign Trial lets you explore all the available features, including those of the Pro version such as walls, sheets, views, photogrammetry, etc.. At the end of the trial period, the application will no longer launch.
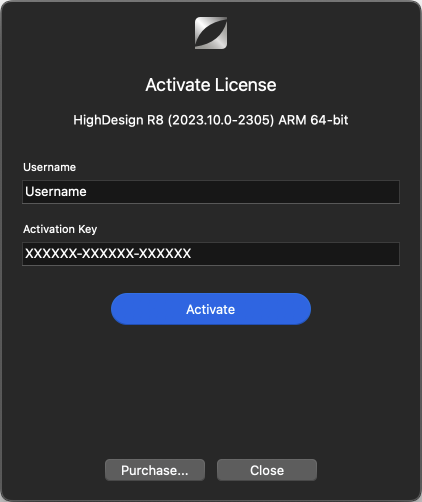
When you purchase a license, launch HighDesign and insert your Username and License Key into the License dialog. There is no need to download a separate package.
Install on Mac
The download version is a compressed Disk Image file (.dmg). Depending on your Internet preferences, the file could have already been expanded after the download.
1. Once the file has been expanded, you should see on your Desktop (or your default download location) the “HighDesign” dmg file. Double-click it to mount the drive.
_
2. To install HighDesign, drag the icon to a folder on your local or network disk. There is no required location; however, if you have multiple users on your computer, put it in the main Applications folder to make it accessible to all of them. Note that you will be required to log in as an administrator to write to the Applications folder.
_
Activate HighDesign
- Launch HighDesign Trial.
- Click the Activate button on the launch window. Alternatively, go to HighDesign > Activate License…
- Enter Username and activation key exactly as they appear in the HighDesign Activation email sent from Ilexsoft.
To remove the license, go to HighDesign menu > About HighDesign and click on the License button: select the license in the table, click the Delete button and confirm.Edit
Uninstall on Mac
To uninstall HighDesign on a Mac, follow these steps:
- Quit HighDesign.
- In the Finder, go to Applications (or the folder where HighDesign was installed), locate the HighDesign icon and move it to the Bin.
Please note that this action will not delete the HighDesign Support folder. The HighDesign Support folder contains all the preferences and custom libraries, which you might want to keep for the next installation. If you want to completely remove the HighDesign Support folder, do the following:
- In the Finder, open the Go menu and press the Option (Alt) key.
- Choose Library and navigate to Application Support/ILEXSOFT. We advise to always make a backup copy of the HighDesign Support folder before continuing.
- Locate the folder you want to delete and move it to the bin.
Install on Windows
After downloading the file, follow these steps to install HighDesign:
- Log in to the computer with a user account that has administrator rights;
- Double-click the EXE install file. You can also context-click and select Run As an Administrator;
- Click Next in the Welcome dialog box;
- Click on the “I accept the terms of this license agreement” button in the End User License Agreement if you agree to the terms;
- Click the Next button to install HighDesign in the default location;
- Click the Install button if you’re satisfied with the settings;
- Click the Finish button when prompted;
Uninstall on Windows
To uninstall HighDesign, go to the Start menu (the windows logo) and follow the path below:
Select Settings > Apps > Apps & Features > HighDesign; Click the “Uninstall” button.
