Create and Edit Symbols
The “New Symbol” and the “Edit Symbol” functions, also available through the Project menu, when activated switch to a different workspace with a limited set of tools: in this environment you can draw, modify and save symbols and symbol views.
You can either create a new symbol from scratch or create a new symbol from the selection: in this case you can also activate this function through the Radial Menu for a quicker workflow. This way the selected objects are now visible in the “Edit Symbol” environment whereas all the other elements of the drawing are hidden.
Create a new symbol:
- Select “New Symbol” on the Project menu;
- The Environment turns to the “Edit Symbol” context with a limited set of tools and the “New Symbol” dialog opens; this dialog is divided into four sections:
- Symbol Name;
- View;
- Attributes;
- Insertion Points;
- Draw the symbol;
- Type the symbol name;
- Select the destination folder through the folder button;
- Use the “+” button to add a new view;
- Type the view name;
- Set the attributes;
- Insert the attributes in the drawing of the symbol view;
- Place the Insertion Points on the desired locations of the symbol view;
- Press the “Save” button on the dialog.
Attributes of the Symbol
Attributes are information added to the current view of the symbol: these information are defined by an ID, a Prompt, showing on screen, and a Default value which will be displayed in the project.
The Attributes section of the New Symbol dialog shows:
- The menu of the existing attributes of the view (visible when editing a symbol and its attributes);
- The Add button to create a new attribute;
- The button to remove the selected attributes,
- The “Edit attribute” button to modify the currently selected attribute.
Since attributes are a sub-class of text, they can get text properties such as font, font size, alignment, style and rotation angle: the “Define Attribute” window displays all these information and options.
To insert the attribute, just click on the desired location of the symbol view.
Edit a Symbol
To edit a symbol you can click on the Edit button of the selected symbol on the Settings window, or select the symbol on the drawing and either choose “Edit Symbol” on the Project menu or use the Radial Menu.
The “Edit Symbol” workspace opens and you can modify the symbol, add views to the symbol by pushing the “+” button of the dialog or delete views through the “-” button, change the attributes of the view.
By pushing the “Save” button, the environment turns back to “Drawing”. Changes made to a symbol are immediately visible in all the symbol duplicates of the drawing.
Use the symbol tool settings window to select the symbol to insert, specify its insertion point, dimensions and display options, and enter any associated attributes.
The Symbol settings dialog has two panes: Symbol and Attributes. The Symbol pane provides you with many options to choose a new symbol and set its graphic properties.
_
Selecting a Symbol
Use the library browser to select a symbol either for insertion or to replace a selected instance.
You can select a symbol to insert by any of the three available libraries. Push the library selector buttons to view the items contained in the default HighDesign library, in your User library, or among the symbols already used in the project.
You have two display options to select a symbol: grid view and list view. Use the selector buttons on the right of the symbol browser header to change the view.
**Select a Symbol in Grid View **
In grid view, you can view the previews of the symbols in the current folder. Double-click a folder to enter it and use the pop-up menu above the symbol browser to go back to a previous folder.
Some symbols may have more than one view. To select a view, open the popup menu next to the symbol name and select one of the available views.
_
Select a Symbol in List View
The list view is very similar to the list view of a desktop operating system: click the disclosure triangle or double click a folder to open it, and select the items in the list. Similarly, open the disclosure triangle of a symbol to list its views.
_
Set Instance Parameters
When you select a symbol, its preview is visible on the top side of the panel along with its default dimensions, angle and options.
_
To select an insertion point
- Move the pointer over the preview, the insertion points appear around the bounding box of the symbol.
- Click a point.
- Any custom insertion point will also be visible and selectable in addition to the nine default locations.
To specify width, height and angle
Enter the desired sizes in the width and height fields. To constrain a proportional resize, click the “chain” symbol between the two fields.
To change the units or to restore the dimensions to their original values, open the popup menu in the Height field and select the desired command.
To lock a symbol instance dimensions and prevent it from being resized by scale changes or editing commands, push the Lock button. When a symbol instance is size-locked, it will keep the entered size until unlocked or resized via the Width and Height fields.
Use the angle field and slider to change the symbol’s orientation, or push the Vertical and Horizontal Mirror buttons to flip the instance around its internal vertical or horizontal axes.
Scaling and Color Options
You can have a symbol be displayed at the correct size at any drawing scale. This is particularly useful for example with architectural symbols, furniture, or trees. To enable this feature, push the Draw at Scale button.
To force the symbol to draw its fills with the same color as the background, or use its original stroke colors, push the Colors button to open the pop-up window.
_
Use the command buttons placed below the symbol browser to create a new folder in the User library, create a new symbol by the selected objects in the drawing area, duplicate a symbol, or delete a symbol.
These commands are only enabled when the conditions are met for each command.
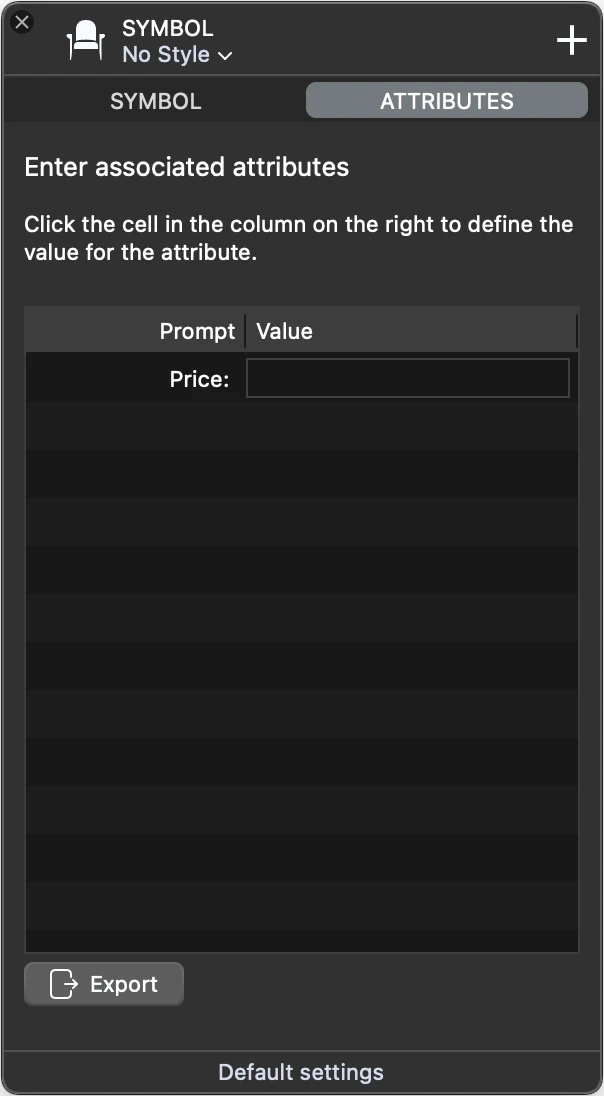
Symbol Attributes
The Attributes pane displays the editable, non-visible attributes of the current view. Use this pane to set the values of the attributes of the symbol or symbol view you are inserting in the project or to change the values of the current selection.
If the symbol contains no editable attributes, the list on this panel is empty.
This panel only lists attributes that are not visible in the drawing.
 _
_