Subsections of Printing
About Printing in HighDesign
The print function produces high quality prints on any page format supported by your printer or by the current print driver in your system.
The basic concept behind printing in HighDesign is “what you see is what you get”, meaning that not only the printed page will look as much as possible as the drawing on screen, but also that no scaling, hiding or other operations are required in order to print the drawing. If the project includes sheets at different scales, they will be printed with the same relative proportions.
All print operations are performed by selecting one of the print items in the File menu.
- Page Setup: opens the standard page setup dialog of your Operating System. Use this dialog to select the printer and set page size and orientation.
- Print: opens a dialog to set HighDesign specific print settings and get information about actual drawing extents and number of pages that will be printed.
Some items of the project are not printable: Detail Area frames and Selection handles. These are objects that are only meaningful on the screen.
Construction objects such as datum points, grid, and construction lines can be printed if the “Print Construction Objects” checkbox in the Print dialog is active.
Print Detail Areas
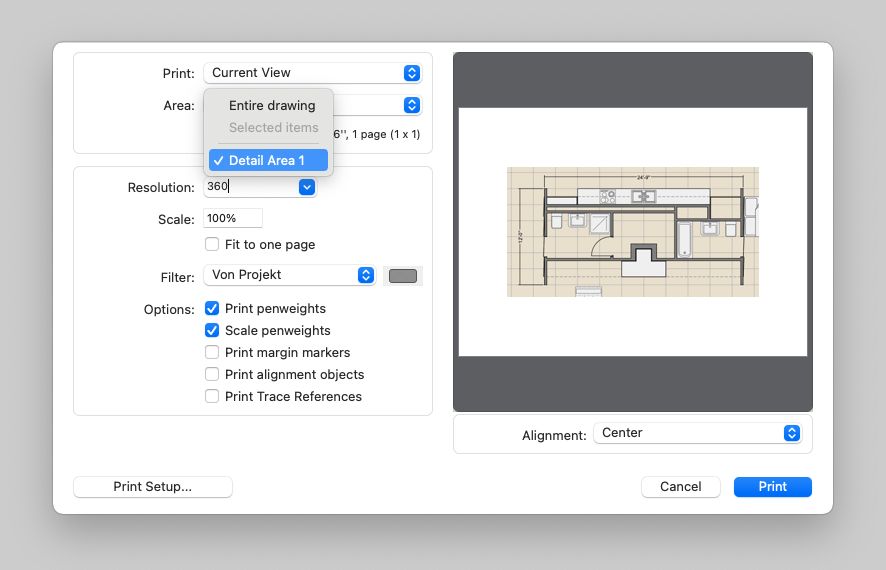
The Area menu of the Print window allows the printing of the whole drawing or just the selection of specific parts of the project, selected items or Detail Areas.
 _
_
The Detail Areas of the project are listed and are available for printing: just select the one you wish to print. The preview will show the updated page layout with the current Detail Area in place of the whole drawing.
Push the Print button to print the selected Detail Area with the current settings and Print Setup.
The Print Preview Window
This window contains the Project View pop-up menu, to choose the view you want to be printed with its corresponding set of visible sheets and layers (Pro-only feature), the Layout pop-up menu, used to set the position of the printed drawing relative to the pages, and the Printable Area pop-up menu, providing a list of possible print options. Available options are:
- Whole drawing: prints all items on visible sheets and layers;
- Selected items: only prints currently selected items;
- Detail Areas: from a list of available Detail Areas, this options only prints the region of drawing included within the bounds of the selected area.
The Print button opens your printer’s Print Settings dialog. This dialog may include different panes for each printer manufacturer.

- Print. Use this menu to select the current view, a saved project View to automatically show and hide sheets and layers accordingly, or a Layout.
- Area. Options of this menu are: Whole Drawing, to print all the visible objects in the drawing; Selected Items, to print only the objects currently selected; any available detail areas created with the Detail Area tool.
- Actual extents of the drawing being printed and number of pages required to print the drawing (rows x columns).
- The alignment menu lists the options to position the drawing within the page.
- The preview of the printed page.
- Resolution menu. Set the print resolution from 180 to 1200 dpi (600 dpi is the default). This value only sets the maximum resolution, but the actual resolution at which the drawing is printed depends on the current printer.
- Scale field to set custom reduction/enlargement factors. The checkbox Fit To One Page calculates the best scaling factor to print the entire drawing on one page.
- **Filter **menu. Lists the options to print by project color settings and to print all colors as monochromatic through the colors menu. Sub-options are the ability to exclude fill colors and to disable the color interpolation of stroke lines. This last option allows to print the drawing with a fixed color regardless of the brightness of the original color in the drawing.
- Options:
- Print pen-weights option: uncheck to print everything as thin lines.
- Scale Pen-weights. When “Fit to one page” is set, the Scale pen weights option allows you to choose whether the pen weights should be scaled to match the new zoom factor of the printout.
- Print margins: if checked, small marks are printed at the corners of the available printable area on each page.
- Print construction objects: if selected, construction points and lines of the selected view will be printed.
- Print trace references (Pro): when enabled, trace references are included in the overall bounds of the drawing and printed.