Edit Groups
Grouped objects can be edited all together like a single drawing object by stretching the handles of the bounding box of the group with the Arrow tool. A group can be moved, rotated, mirrored or scaled like any other object.
- A group can be resized and moved with the Arrow tool. Properties applied to a group are applied to all the group members.
- To select individual members of a group, hold down the command key and click the object. The object will be selected and available to to be modified or deleted. This method is more suitable for quick editing operations.
- You can also modify the members of a group through the Edit Group command.
The Edit Group workspace
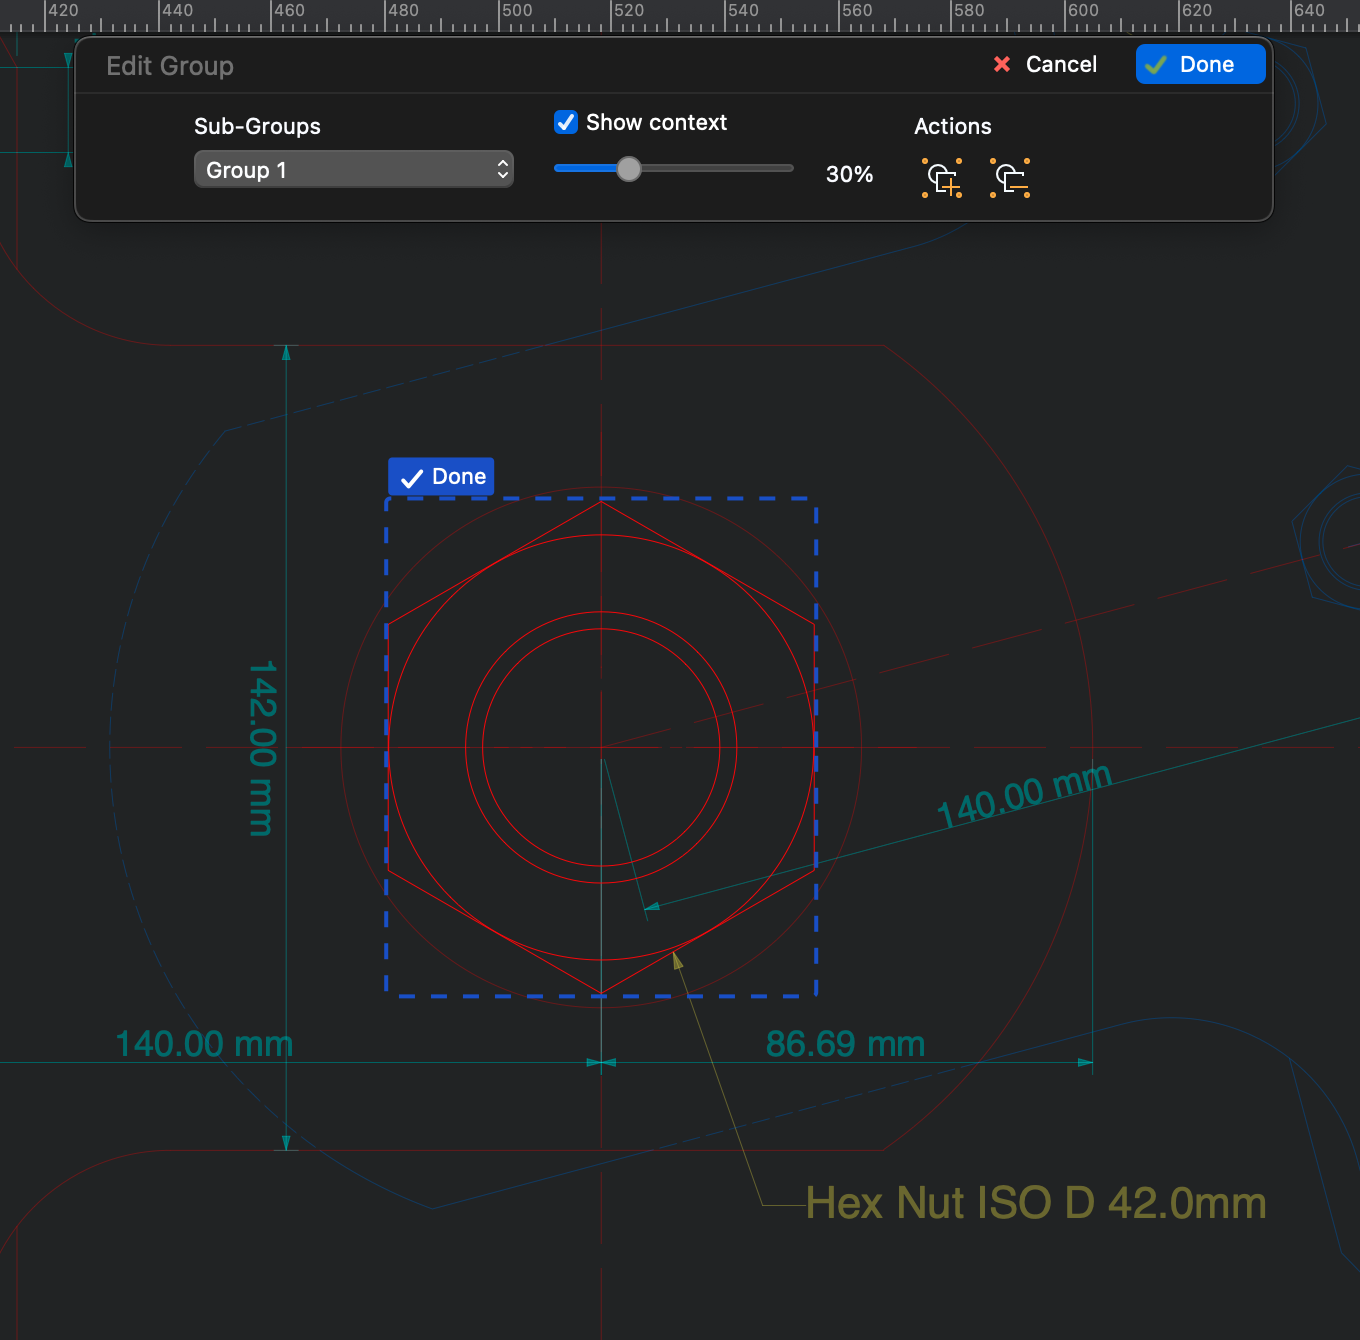
You can activate the Edit Group workspace by selecting a group and clicking the Edit icon on the top-left handle point or by choosing** Project ▸ Edit Group…** This workspace opens a panel with specific commands that let you manage sub-groups, show or hide the context, add objects to the group or remove objects from it.

 _
_
If the group includes sub-groups, you can use the Sub-Groups menu to activate any sub-group or return to the main group. To edit a sub-group, click the Edit icon above its top-left corner. Click “Done” to end the edit.
By default, the edited group is displayed within its context, that is, the surrounding objects of the drawing it is inserted into. You can adjust the level of opacity of the context or disable it altogether.
To add an existing object to the group, push the Add Object button in the Actions section and click any object in the context. In likewise manner, push the Remove Object and click on any object of the group to remove it from the group. The removed object will be moved to the sheet where its original group resides.
You can also draw any class of object using the tools that are available on the Toolbox. Any object created in this way will be added to the current group.
Push Done to confirm the changes and return to the normal workspace, or push Cancel to dismiss all the changes made in the Edit Group workspace.
Group Commands
All commands connected with groups area available in the Project menu. The functions to manage groups are Group, Ungroup, Automatic Grouping, Ungroup All, Edit Group.
- “Group” creates a new group with all the currently selected items;
- “Ungroup” breaks the selected groups;
- “Add to Group” includes selected objects in the currently selected group;
- “Automatic Grouping” is an option that automatically creates groups with items of a shape, i.e. rectangles, regular polygons, poly-lines, walls, etc.;
- “Ungroup All” breaks all groups, including those not selected.
- “Edit Group” opens a workspace where you can modify the selected group by editing, adding or removing members by using the normal drawing tools.
