How to create a schedule in a project:
- Choose Project ‣ Schedules ‣ New Schedule
Alternatively, click the + button on the Schedules section of the Project Browser.
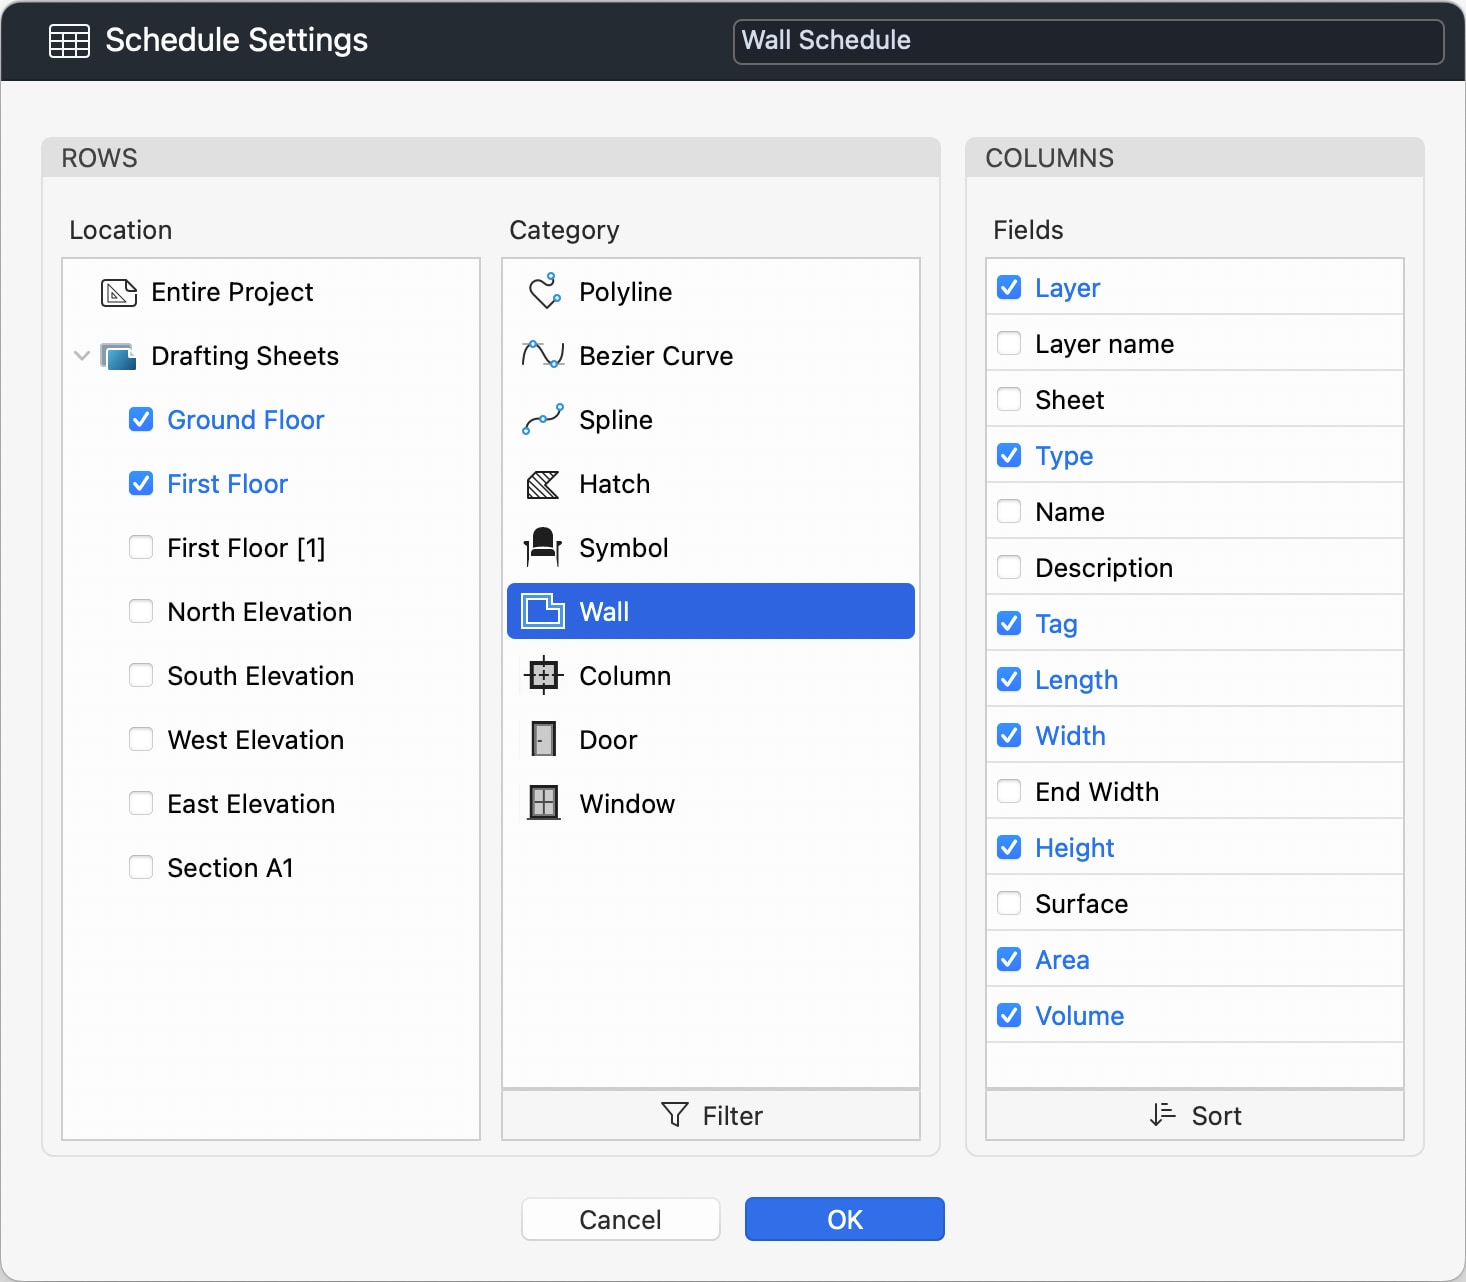
In the Schedule Settings dialog, you can enter a name and define the schema by selecting the category of items that will be listed in the rows of the table, and the fields to show in the columns.
To define the rows, do the following:
- Select the source location where the items will be extracted from. You can select the entire project, or one or more drafting sheets. Details and layouts are not listed because the actual model resides on the drafting sheets.
- Select an item category from the Category list. Only one category can be listed per table. If you need to list more categories, create one schedule per category.
The Category list only includes items whose parameters make sense in a schedule. - For a more granular definition of the items, use the Filter panel.
To define the columns, do the following:
- In the Fields list, select the parameters that you want to be included as columns in the schedule. In addition to common fields, each category shows its own fields.
- You can change the order in which fields are displayed in the schedule, using the Sort panel.
Click OK to create the schedule.


