Chapter 1
Subsections of Columns
About Columns
Columns are vertical elements of the building with a structural function. They vary in shape and size, and share some of the properties of walls.
 _
_
Topics in this section
- Column Tool Settings
- Place a column
- Editing columns
Column Tool Settings
Double click the Column tool icon on the Toolbox to open its Settings panel.
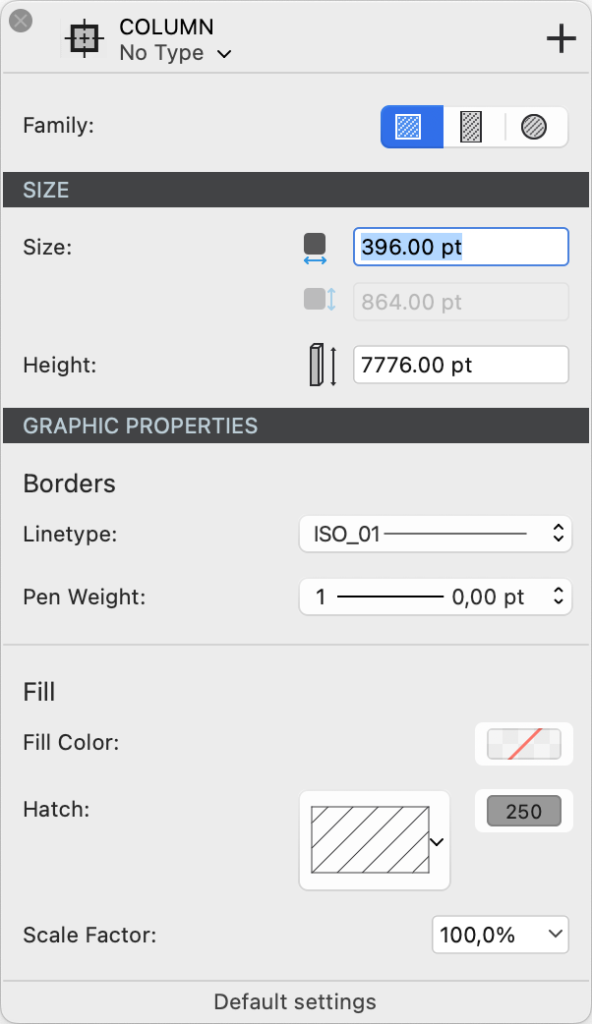
The panel is organized into three sections to define the column’s family, dimensions, and graphic attributes.
 _
_
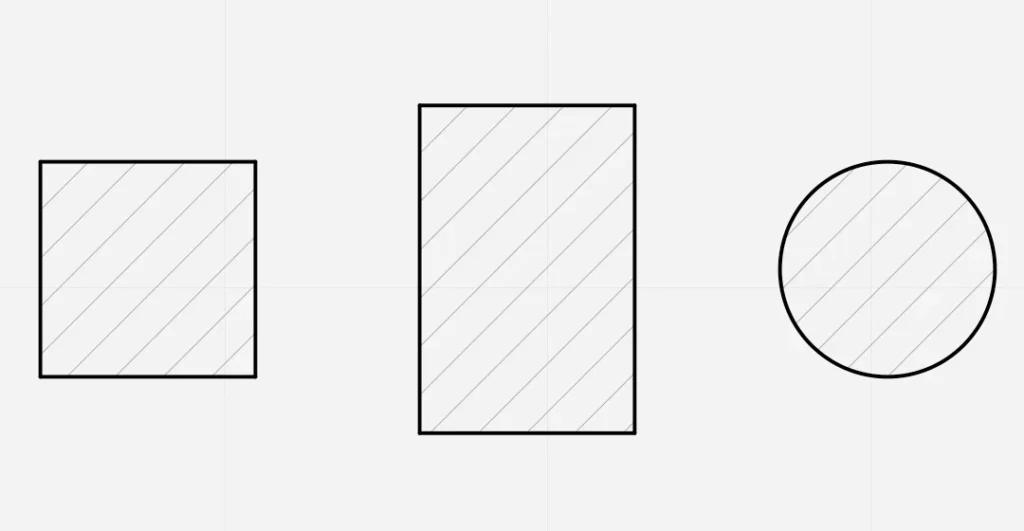
Family
A column’s family is defined by its shape. Click the desired shape choosing from Square, Rectangular and Circular.
Dimensions
You can define base width, base height and height of the column. The base width field is always enabled and in the case of a circular column it defines the diameter of the column.
The base height field is only enabled when the current family is Rectangular column.
The Height field is used for the total height of the column from the base level.
Graphic Attributes
The Graphic Attributes section is divided into two sub-sections: Borders and Fill.
Borders
You can define the line type and the pen weight of the border line of the column in plan view.
Fill
You can add a fill to the column and define:
- A solid fill color
- A vector hatch or pattern and set its color and scale factor.
The fill can use either one of the two fill modes or a combination of the two.
Editing Columns
Move a Column
- Select the column and click its center point.
- Move to the desired location and click to confirm.
Resize
To resize a column, you can use the Column Tool Settings panel, or the Object Info panel.
Editing with the Column Tool Settings panel:
- Select the column and open the Column Tool Settings panel.
- Change the family if you want to reshape the column, or enter the new base width and base height values.
Editing with Object Info:
- Select the column
- Enter the new values for base width, base height and column height.
Place a Column
Before placing a column, choose its type or set is shape, size and graphic attributes in the Column Settings panel.
Columns are always inserted by their central point, so that they align correctly to the structural grid.
- Round columns are inserted with a single click.
- Square and rectangular columns (pillars) require two clicks:
- click to define the center or insertion point;
- move the pointer and click a second time to define the angle of the column. Use the Angle input (A) to enter the desired value.
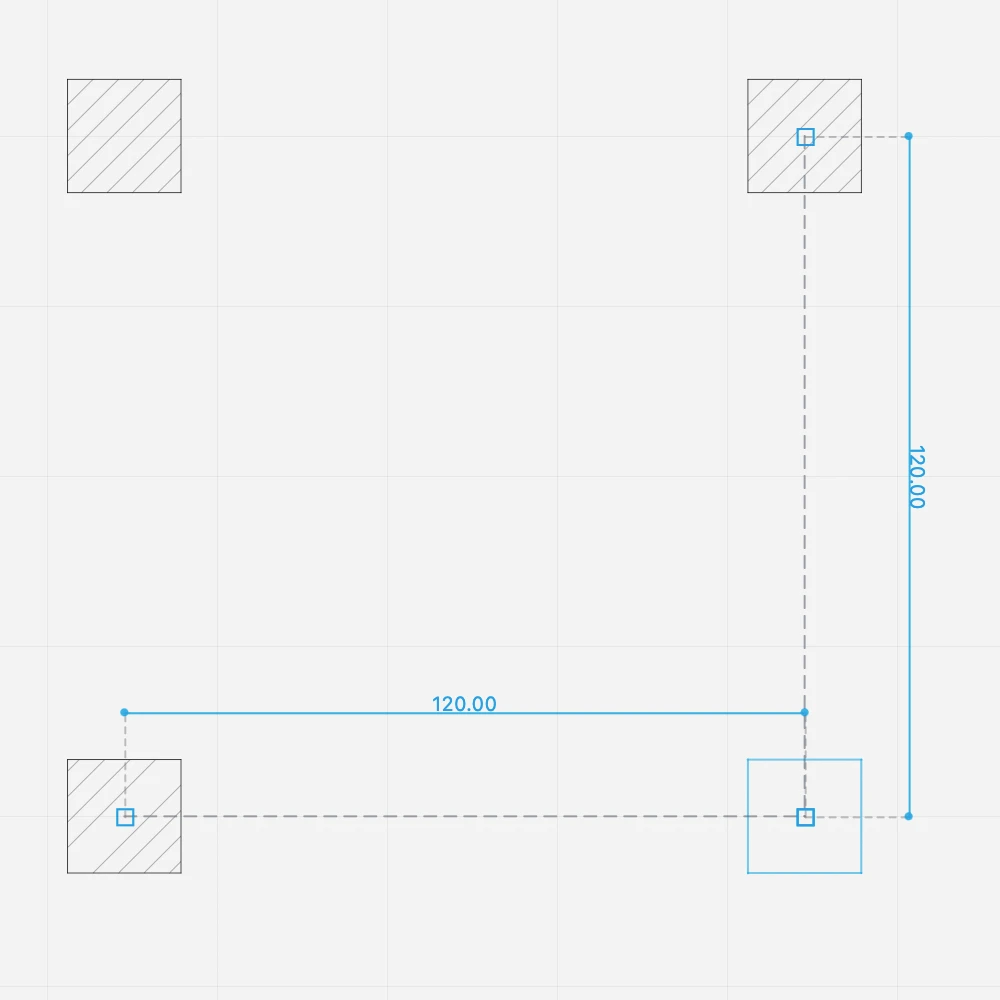
Alignments
When you insert the second column, it automatically aligns with the first column so that you can create the structural grid by placing the columns with just one click.
Square columns also inherit the same orientation as the first column. To change the orientation, hold down the Alt key when you insert the column.
 _
_
To place a column at a fixed distance:
- If not already active, press the Column tool button on the toolbox to activate it.
- As you move the pointer, dimension lines show the distance from the nearest column.
- Enter a distance and press Return or Enter.
The next columns will align to that orientation and snap to the predefined distance.